Showing posts with label chocolate. Show all posts

Saturday, January 20, 2024

The Worst Chocolate Chip Cookies

Sometimes you just need a good cookie.  

Whether you go crazy over chocolate drop cookies, 

like my husband does, or are more of a chewy chocolate chip oatmeal cookie guy or gal 

(which my dad claims are clearly a breakfast food) there is just something about a cookie that hits the spot.  Nine times out of ten, I prefer a plain old chocolate chip cookie.

I have been making Nestle chocolate chip cookies out of a tub of dough for a while now, and it was time to get back to some homemade chocolate chip goodness.  Then while I was over at Sugar Spun Run oogling her cheesecake recipe, I stumbled upon The WORST Chocolate Chip Cookie Recipe.  I had to try it.

I got my son to join me in the kitchen for this one, and we whipped up a batch of these.

Ingredients

  • 1 cup Imperial margarine melted and then cooled until no longer warm to the touch
  • 1 1/2 cups light brown sugar firmly packed
  • 1/2 cup granulated sugar
  • 2 large eggs at room temperature
  • 1 teaspoon vanilla extract
  • 1/4 cup maple syrup
  • 3 1/4 cups (415 grams) all purpose flour
  • 4 teaspoons additional flour (to sub in for the 2 teaspoons cornstarch, since we didn't have it)
  • 1 teaspoon baking powder 
  • 1 teaspoon baking soda
  • 1/2 teaspoon salt (reduced from original recipe, which called for unsalted butter)
  • 2 cups semisweet chocolate chips (half regular sized, and half mini)
We started out by stirring together the melted margarine and sugars.  


My son kept stirring as I added the eggs, one at a time.  We stirred in the vanilla extract and the maple syrup.  Ours was a bit runny, and we were not sure if the cookies might end up flat because of it.  More on that, later. We mixed the dry ingredients in a separate bowl, and added them slowly into our wet ingredients to make the dough. Finally we stirred in our chocolate chips. We covered the bowl, put it in the fridge for at least half an hour, and then scooped the dough out to bake.  They went into the oven, at 350F for 13 minutes and were allowed to cool on the cookie sheet afterward.

The resulting cookies were a little flat.  I forgot to take a picture. They weren't very photogenic, to be honest. But my, were they tasty! Crispy on the edges, and with a lovely flavor.

The next day, I baked up some more of the dough, and tried putting the dough 


into muffin tins


like so


to prevent them from spreading too much.


The texture on the cookie-pucks that resulted was not amazing. The middles barely got cooked. And I like cookies a little dough-y, so from me, that's saying something.


The next day, I baked up yet another tray of them. And, oh my! They were perfect. Was it the extra time in the fridge that helped them set up better? I am not sure. More experimentation will definitely be in order. But this recipe is a keeper!

What are your favorite cookies?

Wednesday, November 23, 2011

Chocolate Peanut Butter Acorns

So, a little over a month ago my aunt Jackie posted a link to her Facebook page.  I've been wanting to do these little guys ever since:


Today, I finally got my chance.  I assembled the three ingredients:


And got to work unwrapping those Kisses.


Now, I should point out, that this is not a milk-free recipe.  But it was so cute, I had to do it anyway.


As a side-note, you may want to hide the ingredients until the day of the craft, if you have husbands (or kids) that will snack on your blogging materials.  (This is the second bag of Hershey Kisses I've bought for this purpose.)


Slowly my plate filled with unwrapped chocolates.  (Not as slowly as if I could have been snacking on them though.)


Next I poured a small amount of mini chocolate chips into a microwave safe bowl.   The Six in the Suburbs blog where I first saw this recipe says half the bag, but that seems excessive.


You microwave them for 10 seconds or so at a time, stirring well in between.  When they start to get melty like this:


Stop heating them, and just keep stirring till they look like this:


Now dip the flat end of one of your unwrapped Kisses into the warm chocolate, and attach it to a Nutter Butter Bite (or a half of one, depending what look you want).


Repeat:


Now you are ready for the finishing step.


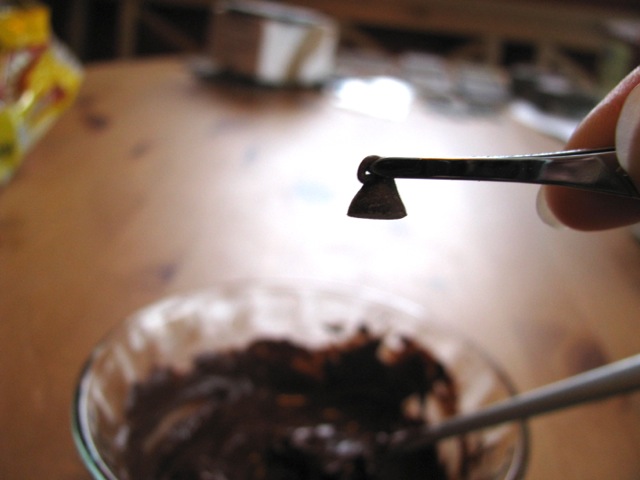
Dip the flat end of one of the un-melted mini chocolate chips into the melted chocolate (you may have to reheat it, depending how long the last step took.)


And place it on top to finish your acorn.


Keep going until they all have toppers.


You are done!  Congratulations on your very cute acorns.


Enjoy!

Wednesday, August 31, 2011

Peanut Butter Frosting

I've decided that my attention to domestic activities appears to be in direct relation to the amount of time I spend alone in my home.  When my husband is home, it rarely occurs to me to try a new recipe or scrub down all the walls.  But when he isn't here... I begin to fill my time in Suzy Homemaker ways.

Today while he was at work, for example, I decided to try making some cupcakes and decorating them with a swirl of peanut butter frosting.  That was a first - I've never made peanut butter frosting before today.  I will be taking these cupcakes to bunco tonight and will see what my tasting panel thinks.  But I am getting way ahead of myself.

First, I mixed up some batter and dolloped it into the tin:


All ready to go in the oven:


When the cupcakes were baked and cooling on the counter, I began making the frosting, roughly by this recipe here.  But I subbed margarine in for butter - then cut it back because no one wants a mouthful of margarine.  I upped the peanut butter to compensate.  I used soy instead of cream.  I also added some vanilla for good measure.  It wasn't looking too promising there for awhile:


But I got it whipped into shape before too long.  Then, using a Pampered Chef kitchen gadget that always reminds me of puffed paint, I started frosting my cupcakes.


Like so:

They turned out like this:


Viola!


I wished I had chocolate sprinkles to top them with, but I don't.  Maybe I will run to the store and get some... along with a container to transport them to bunco tonight.

Happy baking!

Wednesday, December 23, 2009

Peanut Butter Ball Time

This is the time of year to dust off your favorite goodie recipes and make them up. Here I am at my parents house, earlier this week with a plate of cookies and candy to share:


The candy on the plate are Peanut Butter Balls, and they were SO delicious last year I just had to make them again.


I took them to another party last night and everyone loved them. So make sure and check out the recipe.

Enjoy!

Sunday, September 6, 2009

Chocolate Drop Cookies

Two days ago, I found my recipe book on the counter opened to Chocolate Drop Cookies. These cookies are my husband's absolute favorite. He says they are "texturally superior" to most all other cookies. So go preheat your oven to 350* and let's get started, shall we?

Mix together 1/2 cup of butter and 1 cup brown sugar:


(See the goo on the edge? I accidentally put the egg in there before mixing these together, and decided to remove it and do it right.)

Add the egg (or re-add the egg, in my case)

and beat well.

In a separate bowl, combine 1 1/2 cups flour and 1/4 teaspoon each salt, baking soda & baking powder.

Here is something that makes this recipe extremely unusual for me. It uses milk.

But not just milk...

Curdled milk.

To prepare your own 1/2 cup of sour milk (come on, you know you want to!) add 2 Tablespoons of vinegar and stir. Yummy!

Incidentally, when my husband first found out the secret ingredient in his favorite cookies (walking into the kitchen once while his mom was making them) he was completely grossed out and wouldn't eat them for like, a year.

He has since gotten over it. ;) Alternately add 1/3 of the dry ingredients and then 1/3 of the sour milk to the bowl w/ sugar/butter/eggs (you know the drill) and mix well.

Next add 6 Tablespoons of cocoa powder to the bowl.

And blend.

What you have will resemble chocolate pudding.

Drop spoonful sized onto baking sheet (please note: if you use a cookie sheet the cookies will be too thin)

and put them into your preheated oven.

Bake them for 10 - 12 minutes.

When they are done they will probably look a little flat to you.

Do not despair! I am told they are DELICIOUS.

Go ahead and have one or two warm from the oven. But the recipe is not finished yet...

For best texture... after the cookies have cooled, place them on a plate covered with Saran Wrap over night.

Enjoy!